Tuesday

Clubhouse Bubbles, Just Exhale

Here at the Clubhouse we always stumble across our "Word of the Day". When we decided to shrink water beads in the Sunshine, it was Dehydration. When the kids decided to take "The Clubhouse Box" and completely cover it in sticks, leaves and stone, it was Camouflage.

Today, it was Exhale.

Clubhouse Plumbing

Did you know that Rainbow Water Beads actually does sell a pack of Rainbow water beads? I popped a pack into a bowl of water to hydrate, and then drained them. Placed them next to the Waterway Pipe Builders set. Done.

"We need a big box to catch them when they come out!"

This was true, I'm glad he thought of it. 

Had I really not thought of it myself?
  
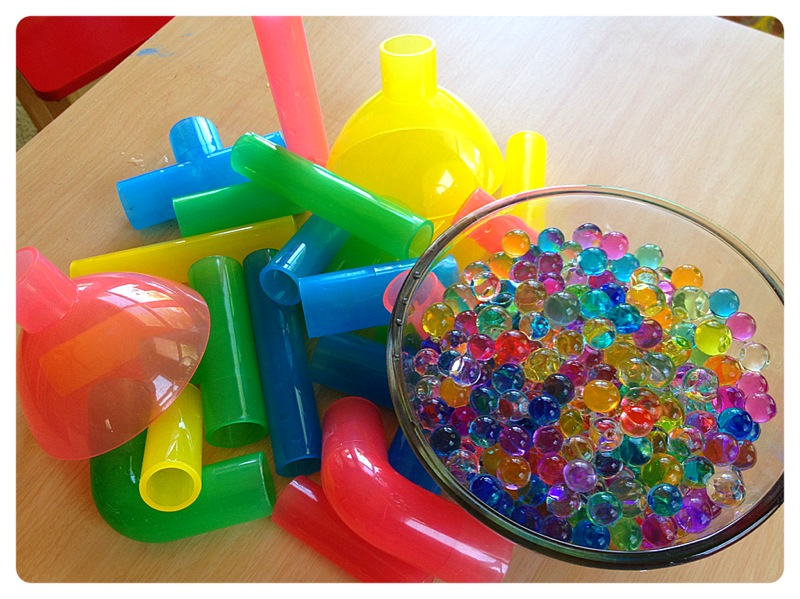
Of course I had. I know how bouncy these little things are.
Sometimes I like to leave "something missing" and watch the Clubhouse Kids come up with their own solutions;)
After fishing out a big Styrofoam container from the pile of "just in case we can use this" recyclable materials, he was all set. 
He started with just a funnel and watched them drop into the container.  Realizing they go right through, he started constructing.

Clubhouse Painting: 23 Ways to Create and Explore with Paint

I remember as a child I painted. With paint. And a paintbrush. On paper. That just about sums it up for my early childhood Art Adventures.

Then when I was 7 my Mother married an Artist, and everything changed. He showed me how to explore mixing colors, incorporating different paints and textures. How to actually make my own paint. He even provided me with,*gasp*, a blank canvas. A variety of canvases actually, all made from different materials. You mean I can paint without having to put a certain color inside of a certain number? Thrilling!

The options, the colors, the textures, the process... it was amazing to think outside of the paint by number book.

That's exactly what I want the Clubhouse Kids to explore. No lines to be colored within, no matching colors to numbers, and no limits on how many different types of materials can be used in one work of Art.

Water Bead Paint, Petroleum Jelly Paint, Puffy Paint,
Corn Syrup Paint, Epsom Salt Paint, and
Toilet Paper Roll Stamps all make up this
Art Display at the Clubhouse.
That being said, I decided to do a little exploring online. The amazing ideas I found, coupled with some of our more recent paint creations here at the Clubhouse, leads us to this list. Together, let's see what kind of Adventures in Art we can have!

Friday

Clubhouse Paint: Cotton Balls Required

Sometimes I spot something in the kitchen/pantry/closet, and I remember a craft/activity/project I used to do back in my Preschool teaching days in Phoenix. When that happens I usually get pretty excited to bring the fun to the Clubhouse Classroom!

That's what happened in the kitchen the other day when I was unrolling aluminum foil. I couldn't believe I hadn't done this one with the Clubhouse Kids yet!

Vaseline (a.k.a. petroleum jelly) and aluminum foil.

I laid the foil out on the table, and put some globs of Vaseline everywhere.

"We're going to paint on shiny stuff with gucky stuff, yayy!"

They were excited already.

Wednesday

Clubhouse Bubbles: Colorful Edition

Often the first thing a Clubhouse Kid asks me when we're walking through the doors to head outside is,

"What's in the water table?!"

Can't very well just say water, now can I?

Truth is, as the Sun is heating up here in the Arizona desert, that means A LOT of water play in the outdoor sensory table is in store for us. Sometimes it really is as simple as some water and a couple of funnels. Trust me, kids can play with that on a hot day for quite some time! Usually though, we do like to get creative with what goes in there.


Tuesday

Clubhouse Flowers: Try, Fail, Adjust

We are working on special treats for Moms this week, and today we decided to pull a page right out of Parents Magazine and make some flowers from toilet paper rolls. I love making anything from toilet paper rolls since I never throw them away and we only have so much storage space for all of our soon to be upcycled materials.

The article, Recycled Blooms, in which they give you the details on this activity, simply gives you a list of what you need and a few very brief instructions. Then they post this picture as the end result:


I'm working with Preschoolers here and was expecting no such perfection. I mean, really, are they actually saying children cut those perfectly straight lines in the cardboard tubes? Even aside from those perfectly straight lines, that is one picture perfect paint job. I'm still trying to figure out how they did that.

Here's the Clubhouse Kids take on these flowers.

We cut the tubes. No pictures of this since when I have the "sharp" scissors out, I put the camera down. Basically, they cut strips into the roll on both sides while leaving a space in the middle. Then we bent the strips down. Voila, a flower. On to the painting part.


First, let me begin by explaining that  the kids decided they needed to wear sunglasses for this activity. That wasn't in the original list of  'What You'll Need', but who am I to argue with creative genius? 


Next, look at his lips (there, in the picture above). That's his this is not eeeeeven working face. Paint all over his fingers, the "flower" flopping everywhere, he was not having it, and he wasn't the only one.

Clubhouse Painting: No Paper Required

Sometimes it really is so simple.

Ever since we made our shaving cream Earths, the Clubhouse Kids have been asking to paint with shaving cream. Or so I thought they wanted to paint...

We started with shaving cream (at this point we were actually using paper).

Added a little color, a few drops here and there and let them swirl it all around.


Trust me, just a few drops of food coloring go a long way in an activity like this.

The Clubhouse Kids stayed on the paper (and paper plates) for a little while...

Swirling, pressing paper on top, creating their shaving cream art.


Then they got feisty.

Friday

Clubhouse Beads, Bottles and Baggies

As anyone who has used water beads knows, they last awhile if they are stored properly. You can use them in a sensory table, over and over again, and they will be fun every single time. Here at the Clubhouse though, we like to use them in as many ways as possible. Most recently, adding them to a few sensory bottles and baggies.


The first sensory bottle was easy, we already had "fully grown" black water beads from our "can of worms" sensory table, so we added a handful of those to some water. I then added a few green beads that had not expanded yet. Seeing them grow in the bottle was part of the fun.


Immediately this bottle was rolled, shaken, and rolled some more.

Actually, there was a lot of rolling involved with this one...

"Look at how the beads bounce all over when I roll it!"


As the green beads started to grow, that made for even more shaking and rolling. This was one popular bottle!

Next up was a bottle filled with oil, water and

Wednesday

Clubhouse Worm Diary, Day 5

"Today is May One Ms. Liz, just like in the book!!"

Well look at that, they really do pay attention in the morning when we change out our calendar days. 

Conversation easily led into discussing good manners (comments recorded into their own Clubhouse Diaries, of course).

"That's when you say please, thank you, and no way!"

"When you fart you say excuse me..."

Real Gentlemen we have here at the Clubhouse ;)

On to today's sensory adventure. 

I can hear you now... finally they get to touch worms!!